Quick answer: which fits your small kitchen?
When you compare a peninsula vs island small kitchen, the right answer depends on how you move, cook, and gather. A peninsula anchors to a wall or cabinet run, so it naturally shapes traffic and delivers extra storage without demanding wide walkways. A small island brings circulation around all sides, so it works best when you have at least one clear loop and enough aisle space. If you have a narrow room, choose a peninsula. If you have an open concept or a square room with at least 42 inches of clearance on two sides, choose a slim island. If you entertain often and need seats, both can work, but measure carefully so stools do not clutter your path.
The rules of traffic flow in small kitchens
Aisle and clearance guidelines
Good flow protects your shins, your cabinet doors, and your patience. Use these simple numbers to shape your layout before you decide between a peninsula and an island.
- Minimum aisle for one cook: 36 inches between counter edges.
- Better aisle for two cooks or heavy traffic: 42 to 48 inches.
- Space behind seated stools for pass through: 36 inches minimum.
- Space behind seated stools for a walkway with people passing: 44 to 60 inches.
- Dishwasher door open to adjacent cabinet: keep at least 21 inches clear so you can stand and pivot.
- Refrigerator doors: plan for full swing, plus 15 inches of nearby landing space.
Work triangle and zones that fit small spaces
The classic work triangle connects sink, fridge, and cooktop. In a small kitchen, keep each leg 4 to 9 feet, with a combined total between 13 and 26 feet. If your room is tight, think in zones instead. Prep flows from fridge to sink to cooktop. Dish flow returns to sink and dishwasher. Keep these routes free from stool backs and door swings. A peninsula often creates a clean prep zone at the tip. A small island can host prep or seating, but not both if the room is narrow.
Doorways, appliances, and the corners that bite
Appliance doors open into your path, not away from it. Place the dishwasher on the side of the sink that faces open space, not a corner. Avoid placing a range in a corner with only one approach. If you install a peninsula, keep its end clear of a hallway, so you do not create a trap. If you install an island, avoid tight corners between island ends and tall pantry cabinets. You should not have to move a stool to open the fridge.
Peninsula vs island small kitchen: how each handles flow
What a peninsula does best in tight footprints
A peninsula is attached on one side to a wall or a cabinet run. It is ideal when you have only one obvious path through the room. The peninsula stops cut-through traffic from crossing your prep zone, which keeps kids and pets out of the danger line. It also gives you deep base cabinets with no aisles to maintain on the far side. That means more storage for pots, pans, and small appliances. In a narrow galley, a short peninsula at the end can add two stools without choking the walkway. If your small kitchen opens to a living area, a peninsula can define the boundary while keeping sight lines open.
Where a small island shines
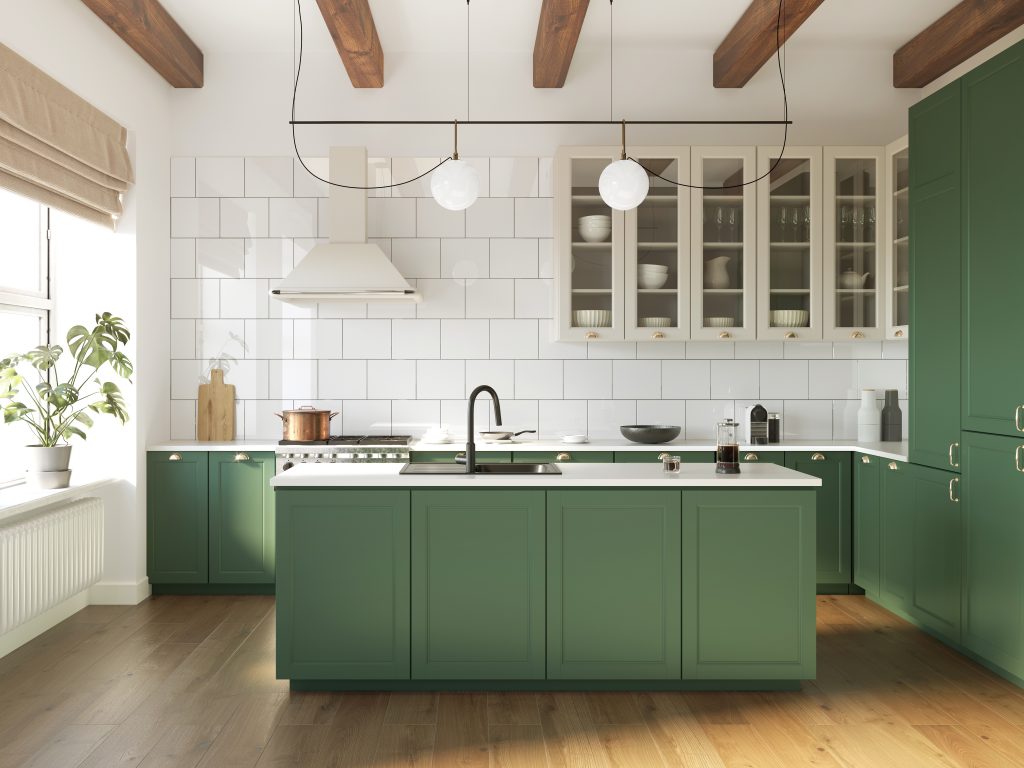
A small island works when your room can support a loop. People can circulate around the island while you prep. That means fewer collisions and fewer interruptions. A slim island can be only 24 inches deep and 48 to 60 inches long, but it still needs 36 to 42 inches of aisle on at least two sides. Islands feel social. Guests face into the kitchen, and you can prep across from them. Islands take power easily with a pop-up or a side outlet. They make a perfect landing zone for groceries and a drop spot for bags. If you choose an island in a small kitchen, keep the top uncluttered and commit to a shallow trash pull-out or narrow drawer stacks to maintain clearance.
When neither is right
If you cannot maintain at least 36 inches of clear aisle around an island or at the open side of a peninsula, skip both. Overcrowded layouts reduce safety and comfort. In some tight rooms, a mobile cart or a narrow table works better. You can roll it out for prep and slide it away at dinner time. If you rent and cannot change cabinets, a free-standing butcher block can mimic some island benefits without the footprint.
Seating that actually works in small kitchens
Realistic stool counts and spacing
Stools need elbow and knee room. Squeezing in more seats than the counter can support will frustrate everyone. Use these spacing guides before you commit.
- Stool width per person: 24 inches minimum, 30 inches is comfortable.
- Linear seating capacity: divide the seating edge length by 24 for a maximum count.
- Corner or wrap seating: do not count the inside corner as a full seat in small kitchens.
Example: A 60 inch seating edge fits two stools. Three will feel tight and will block the aisle when people shift.
Overhangs and knee room for comfort
Overhang depth matters more than people think. Shallow overhangs force knees against cabinet doors, which makes seats uncomfortable and noisy.
- Counter height seating at 36 inches: 12 to 15 inches of overhang, 15 inches feels best.
- Bar height seating at 42 inches: 12 inches of overhang works.
- Table height seating at 30 inches: 18 inches of overhang is ideal.
- Knee clearance height: about 15 inches for counter height, 12 inches for bar height.
Support deep overhangs with hidden steel brackets or sleek corbels to prevent wobble. On a peninsula, consider shifting the seating to the outside corner to add one more comfortable spot without widening the room.
Back-of-seat clearance that keeps traffic moving
Measure from the counter edge to the next obstruction such as a wall, appliance, or another counter.
- 36 inches allows someone to slip behind a seated person.
- 44 to 48 inches allows two people to pass comfortably.
- 60 inches creates a true thoroughfare behind seating.
If your measurement is under 36 inches, choose backless stools that tuck under, or skip seating on that side. You can also angle the peninsula end slightly to steal room for a third seat while preserving clearance.
Storage and utilities: get more from your choice
Peninsula storage ideas that pull their weight
Because a peninsula uses only one working side, every inch can be storage. Add deep drawers for pots and pans. Add a tray divider for baking sheets near the oven. Use a blind corner pull-out where the peninsula meets the wall to reclaim hard-to-reach space. If you seat people at the peninsula, add a shallow cabinet at the stool side for placemats and napkins. Consider a beverage drawer at the peninsula tip, so guests can grab a drink without crossing the cook zone.
Island storage ideas for small rooms
A small island can be storage rich if you plan the core wisely. Use 18 inch deep cabinets on the stool side to create a two sided island that is only 36 inches deep plus overhang. Add a built-in trash pull-out on the prep side. If you have enough ventilation, a small prep sink on a 48 to 60 inch island can transform workflow. Reserve at least 24 inches of counter on one side of any sink for set down space. Use drawers instead of doors whenever possible to reduce door swing into the aisle.
Power, lighting, and ventilation details
Install at least one outlet in a peninsula gable or end panel for small appliances. For islands, local codes often require a receptacle. Pop-up outlets keep visual clutter low. For lighting, center two or three small pendants over the seating edge rather than the island center in narrow rooms. This brings light to faces and to the prep edge. If you cook on a peninsula or island, plan a proper hood. Downdrafts are compact but may underperform. Ceiling inserts with a slim shroud can be discreet and strong.
Real plan examples you can copy
8 by 10 galley: micro island on wheels vs short peninsula
Footprint: two 10 foot runs, 36 inch clear aisle. Goal: one prep helper, two informal seats.
- Option A micro island: 24 by 36 inch cart with locking casters, butcher block top, one drawer. Park the cart opposite the sink. Roll it out for prep, tuck it under the window when not in use. No fixed seating, but add a 12 inch wall mounted drop leaf table at the end for two stools.
- Option B short peninsula: 24 inch deep by 54 inch long peninsula attached to the fridge wall. Seating for two on the living room side with a 12 inch overhang. Maintain 36 inches clear at the open end. Add drawers for utensils and a pull-out for trash. Flow is protected, no stools block the working aisle.
10 by 12 L-shape: corner sink with peninsula seating for three
Footprint: 12 foot long main wall, 10 foot return, open to dining. Goal: three seats that do not jam the walkway.
- Peninsula: 30 inch deep by 78 inch long. Seating on the outside edge for three with 15 inch overhang. Back-of-seat clearance to the dining table: 44 inches. Place the sink in the corner to keep the peninsula tip free for prep and serving. Add a beverage center on the dining side in a shallow cabinet to keep guests out of the cook zone.
- Flow: fridge at far end of the 12 foot wall with 15 inch landing. Range along the long wall with 24 inches of space on each side. Dishwasher on the short leg near the sink, door opens away from the peninsula seats.
12 by 12 open concept: slim island with four stools
Footprint: square kitchen open to family room on one side. Goal: four daily seats and easy loops.
- Island: 24 inches deep cabinets plus 12 inch overhang, total top depth 36 inches. Length 90 inches. Seats four along the family room side with 24 inch spacing. Aisles are 42 inches on the cook side and 48 inches on the fridge side for traffic.
- Details: a 15 inch prep sink at one end with a pull-out trash below. Outlet on island end panel for mixers. Two small pendants centered over the seating edge. Under-cabinet task lights on the perimeter for prep clarity.
Common mistakes and how to avoid them
- Choosing an island without a loop: if traffic dead ends at a wall, a peninsula will feel better.
- Overseating: do not cram a third stool into 48 to 54 inches of space. It will block drawers and aisles.
- Shallow overhangs: anything under 10 inches at counter height feels cramped. Aim for 12 to 15 inches.
- Poor appliance alignment: a dishwasher that opens into a walkway creates bottlenecks. Place it on the open side.
- Island too deep: 48 inches of island depth in a small room eats aisle space. Stay near 36 inches total if you need seating on one side only.
- Skipping outlets: plan power at the peninsula or island, so blenders and laptops have a home.
- Ignoring landing zones: keep 15 inches of open counter near the fridge and near the oven.
Cost and timeline snapshot
Budgets vary by region and finish level, but you can plan with rough ranges.
- Peninsula add in an existing run with stock cabinets: lower cost, fewer sides to finish, faster install.
- Small island with finished panels on all sides: higher cost per cabinet, plus electrical routing.
- Countertops: seams and slab size matter. A long peninsula may need a seam. A small island often fits a single slab remnant.
- Timeline: a peninsula that uses existing flooring may install in days. An island that needs new electrical and flooring patches can add weeks.
How to measure your space in 20 minutes
- Sketch the room outline on paper. Mark doors, windows, and any openings.
- Measure wall lengths corner to corner. Write each number on your sketch.
- Measure from each corner to the center of doors and windows, then add their widths.
- Measure ceiling height and note soffits or beams.
- Mark fixed features like radiators, vents, and columns with dimensions.
- Note appliance sizes you plan to keep. Measure widths and door swing clearances.
- Decide where you want seats, and mark the seating edge length needed based on 24 inches per stool.
- Draw a peninsula or island option to scale, then verify 36 to 42 inch aisles with a tape measure on the floor using painter’s tape.
FAQs: peninsula vs island small kitchen
Which layout is better for families with kids?
A peninsula often wins because it blocks through traffic from crossing the hot zone. Kids can park at the outside edge for snacks while you cook inside the U shape.
Can a tiny kitchen have an island?
Yes, if you can keep at least 36 inches clear on two sides and you limit the island to about 24 by 48 inches. Use backless stools that slide fully under the top to save space.
How many stools can I fit on a 6 foot peninsula?
Two comfortably at 24 inch spacing, three only if you have at least 72 inches of seating edge and 44 inches of clearance behind.
Is a sink or cooktop on the island smart in a small room?
A small prep sink can be great. A cooktop needs ventilation and extra landing zones, which can crowd a small island. If space is tight, keep the cooktop on the perimeter.
What countertop overhang do I need for comfort?
Plan 12 to 15 inches at counter height. Support overhangs over 10 inches with hidden brackets to prevent flex.
Will an island make my kitchen feel smaller?
If aisles drop under 36 inches, yes. If you keep 42 inch aisles and choose slim cabinets, an island can actually open the room by creating a clear loop.
Final checklist to choose with confidence
- Map your main path from entry to fridge to sink. If it is a straight line with one exit, favor a peninsula. If you can loop, a small island can work.
- Measure available aisles. Under 36 inches means neither is right. At 36 inches, a short peninsula works. At 42 inches plus, a slim island is possible.
- Count seats with math, not hope. Divide seating length by 24 inches to get the real stool count.
- Check appliance swings. Doors must open without moving a stool or hitting a corner.
- Protect prep zones. Keep the seating edge away from the main prep board by at least one step.
- Plan utilities. Do you need power at the seating edge, a trash pull-out, or a prep sink?
- Mock it up. Use painter’s tape on the floor. Place stools and open appliance doors to test.
- Choose finishes that lighten the look. Waterfall ends are beautiful, but in small rooms a clean square edge with slim support feels airier.
Design tips from real projects
Angle the peninsula end by 15 degrees to ease the squeeze near a doorway, and you can often keep a third seat. If your island competes with a dining table, drop the island seating count by one and add deeper drawers instead. Replace peninsula corner cabinets with a diagonal open shelf for cookbooks to soften the transition to the living room. Use counter height seating in small kitchens, not bar height, since counter height keeps sight lines lower and makes the room feel larger. Choose backless stools that tuck away flush under the overhang. Use a light paint color on the peninsula or island base, and match the toe kick to the floor tone to make the piece float.
Putting it all together
When you weigh peninsula vs island small kitchen options, let movement lead your decision. Peninsulas excel when you need to control traffic and add storage without widening aisles. Islands thrive when you can create a loop, invite guests into the conversation, and keep circulation open on two or more sides. Whichever you choose, build in the right seating depth, elbow room, and back-of-seat clearance. Respect the 36 to 42 inch aisle rule, plan realistic stool counts, and keep landing zones near appliances. Use the sample plans to tape out your room, then adjust by an inch or two until it feels right in real life.
Next steps
Walk your space with a tape measure and painter’s tape, then test the mock up for a week. Try setting stools, opening doors, and moving through your cooking routine. Keep notes on what slows you down or what feels tight. Use the checklist above to refine clearances, seating, and storage. With the right measurements and a plan that respects how you live, your small kitchen can deliver big function and comfortable seating that truly works.


